
In this post, you will learn how to make free notifications from your application.
I’ve been looking for a long time how to make simple email notifications. The topic popped up quite often because many times I had such a situation that I needed to send an email from the application to the user. In my applications, I often use the log4net event logging service – most often the output for logging is a text file, but it can also be an email – it is so convenient that we can receive diagnostic messages from our applications whenever an error occurs in them and thanks to this, we are able to react before the user even sends us a notification.
I did a lot of research to find the right solution – several times I approached the topic and always ended up setting up a free mailbox on gmail or outlook, but the problem is that it is difficult to choose the right name for this mailbox because names such as “info” or are already reserved or are reserved. In addition, it would be good to send messages from the mailbox with the appropriate domain – then it looks professional.
After a long search, I found a service that perfectly met my needs. It is a solution based on Microsoft Azure and SendGrid and is completely free, assuming that we will not send more than 25,000 e-mails per month. It is difficult to say whether there is much or little, but for my needs it is enough to start with. You can also set up a Microsoft Azure account for free here (as far as I know, it is necessary to connect a credit card, but no funds from it are charged for the above-mentioned services).
The service configuration should be as follows:
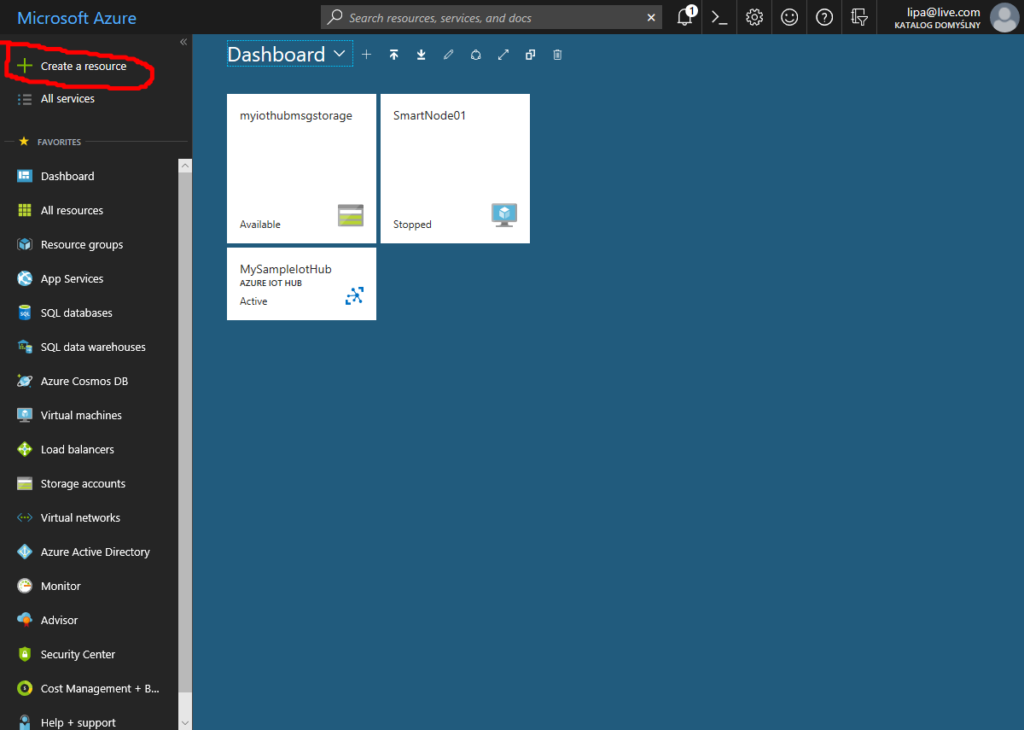
If we already have an Azure account, log in to the azure portal and click “+ Create resource” from the left menu
In the search field, type “SendGrid Email Delivery” and press Enter
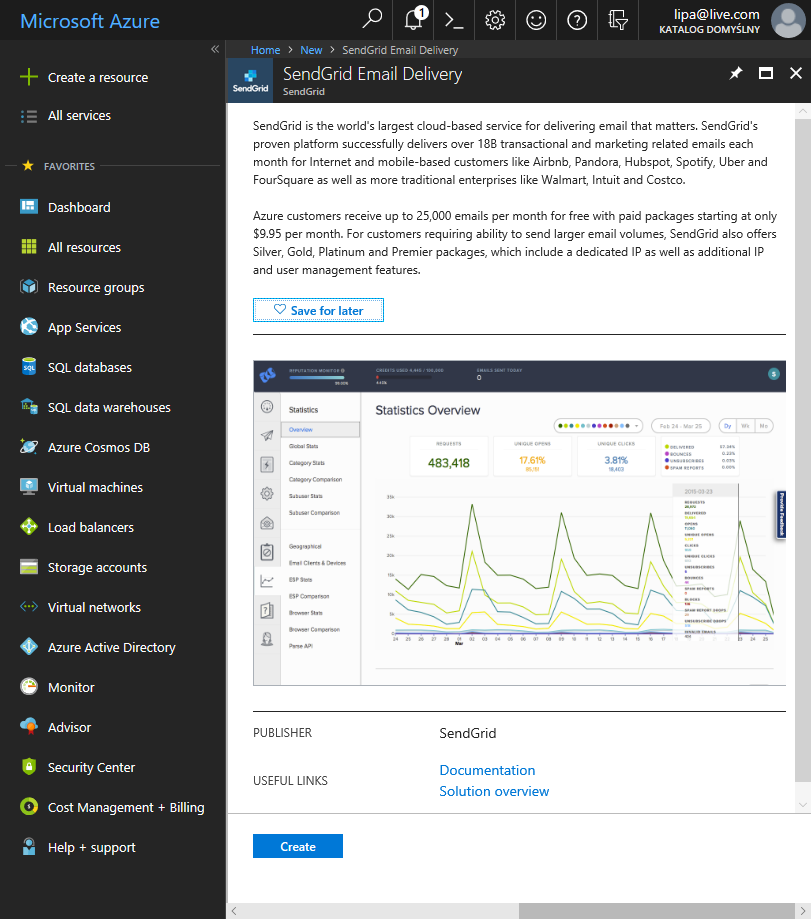
Then click the “Create” button and we have to fill in the required fields:
1. Name – any name (must be unique) that we will not need
2. Password for the service – we will need the password to send e-mail messages, so it’s worth remembering or saving it
3. Subscription selection
4. Selection or creation of a Resource group
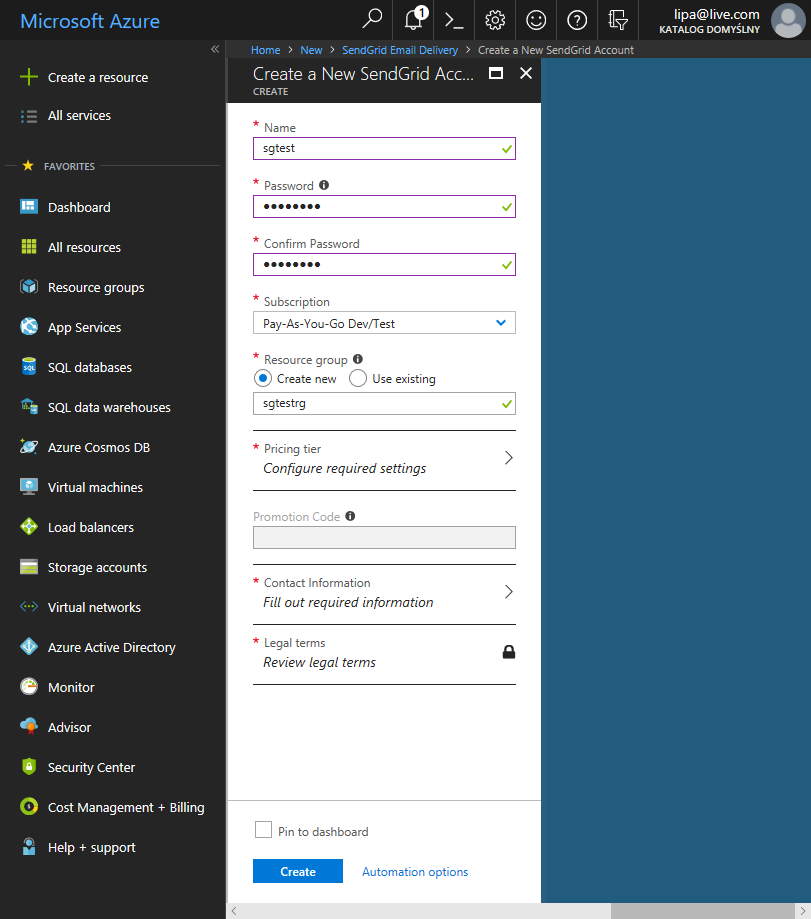
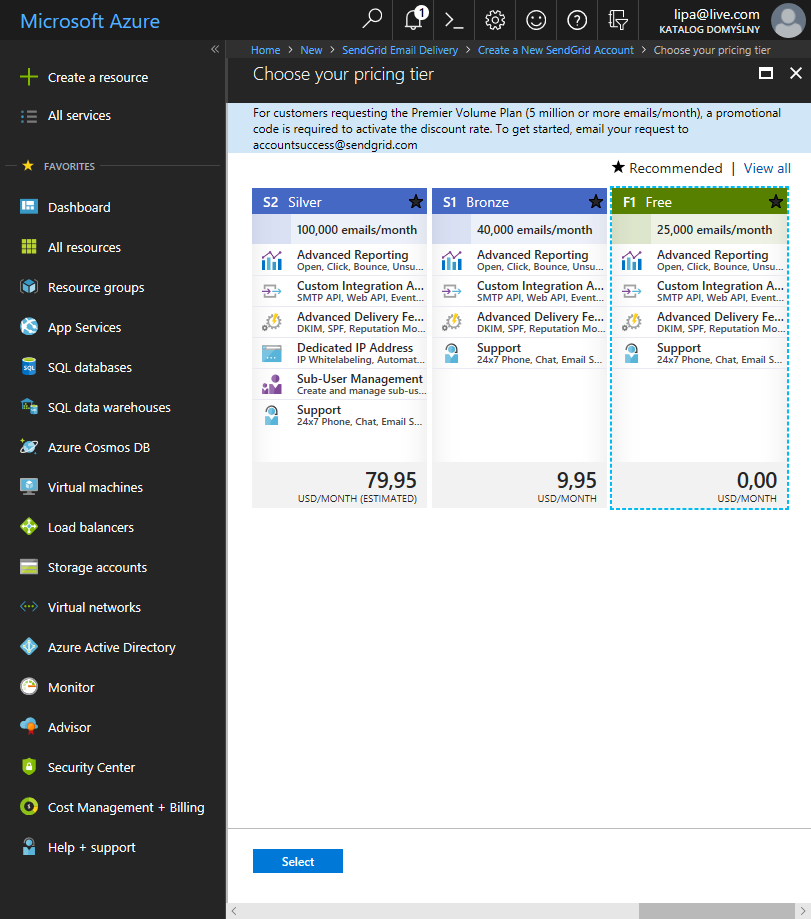
Then we choose the version of the service – as you can see below, there is a free option 🙂
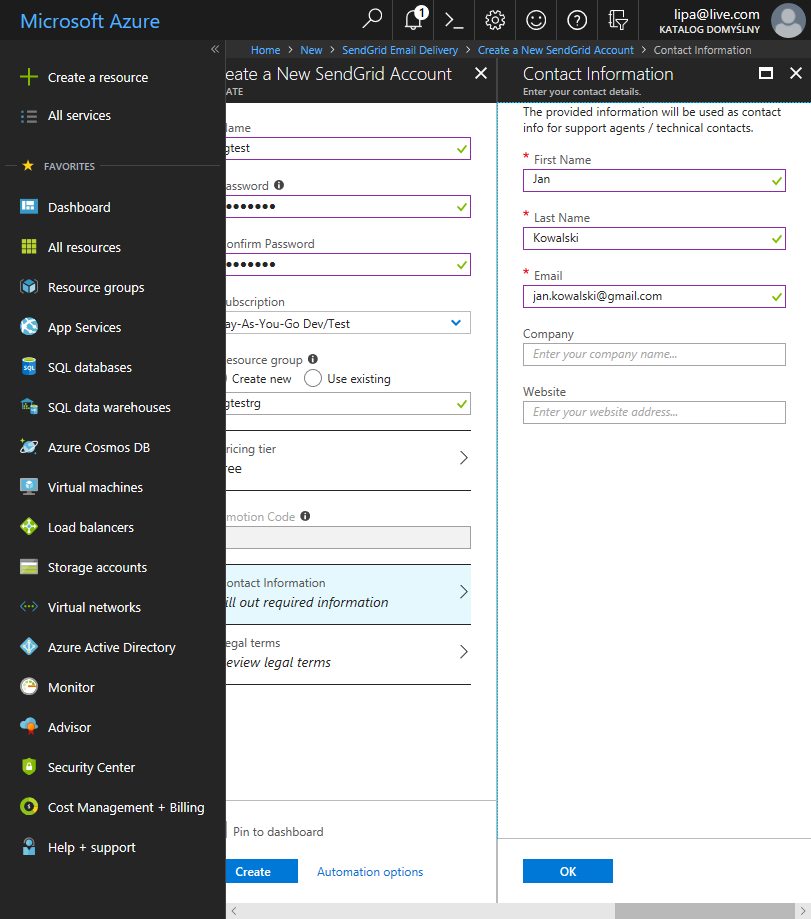
We still need to provide contact information.
and review and accept the legal terms
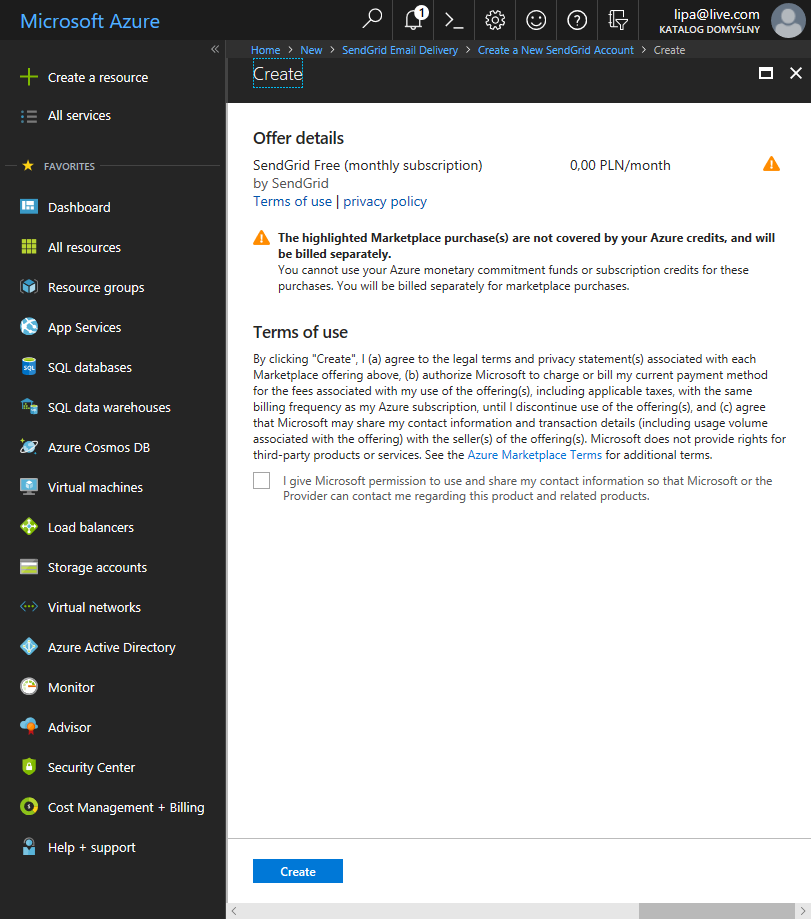
When everything is correctly filled in, we will be able to click “Create” and our service will be created.
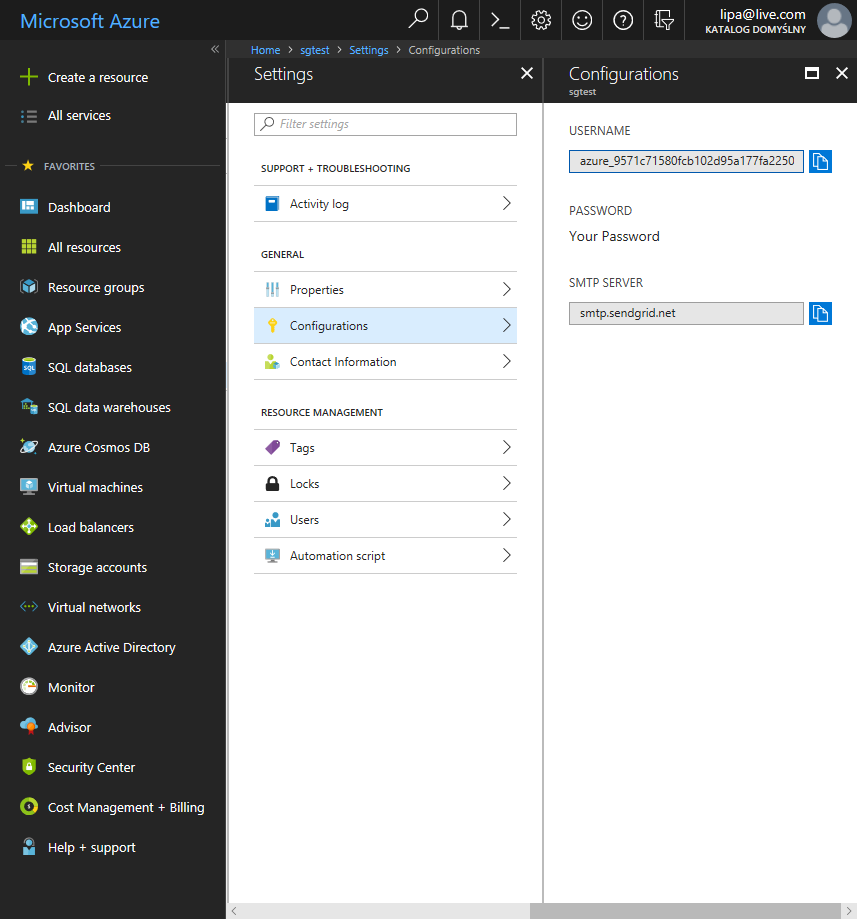
Now we can check our service data and manage it – there are many management options, but that is a topic for a separate entry. To send notifications, we will only need the SMTP server data, username and password, which can be checked in the settings:
Now we can test the operation of the mail with the following powershell script, replacing the values from <> with the appropriate data:
$ From = “<sender’s email address>”
$ To = “<recipient’s email address>”
$ SMTPServer = “<SMTP server address>”
$ SMTPPort = “587”
$ Username = “<username>”
$ Password = “<password>”
$ subject = “Test”
$ body = “This is a testmail using SendGrid Email Delivery”
$ smtp = New-Object System.Net.Mail.SmtpClient ($ SMTPServer, $ SMTPPort)
$ smtp.EnableSSL = $ true
$ smtp.Credentials = New-Object System.Net.NetworkCredential ($ Username, $ Password)
$ smtp.Send ($ From, $ To, $ subject, $ body)
If everything was correctly configured and we provided the appropriate values, then after about 2 minutes (unfortunately it takes a while) we should receive a message to the addressee’s e-mail address.